
Prerequisites
- To create a silent install of AutoDesk products, you will need the appropriate software (CD or downloaded) and license keys for activation.
- 1-2 test machines checking into your K1000.
Overview
- AutoDesk products integrate tools to make mass deployment easy for IT administrators. This guide is meant as a quick walkthrough of a basic configuration, but if a more advanced deployment is needed please contact AutoDesk for additional information.
Step 1
- Either from the AutoDesk disk, or the directory where the install files are located, run Setup.exe
- Once the program launches, click on Create Deployment in the lower left of the install window
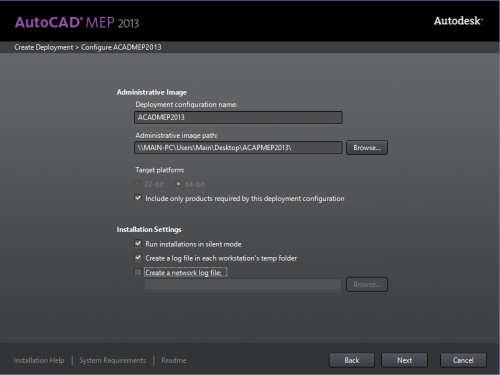
- Enter the Deployment Configuration Name – For our exercise I will be calling mine ACADMEP2013
- Enter the Administrative image path (This is where AutoCAD will place the silent install files) – For our exercise I will be placing this on my desktop in a directory called ACADMEP2013
- Select a 32 or 64 bit deployment
- Choose the installation settings – For our exercise I will be choosing the first 2 so that the install will run silently, and create a local log file
- If your install is having problems, check the log file afterwards, and try creating an installer that isn’t silent so you can see when an error happens.
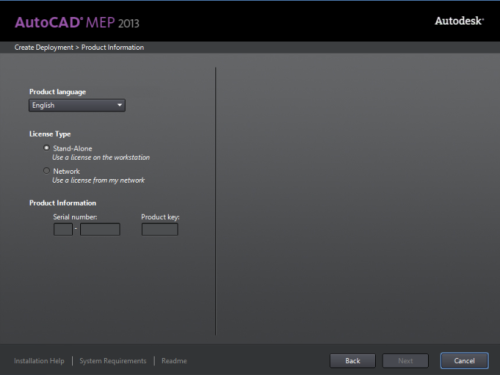
- Click next and accept the license agreement.
- Click next and enter the License type and Product Information – MAKE SURE THIS INFORMATION IS CORRECT OR THE INSTALLATION WILL FAIL
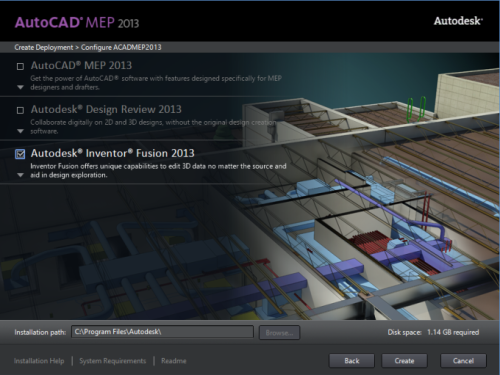
- Click next and choose what products you will include in the installation
- Additionally if you click on the down arrows on each product you can add service packs to be applied durring the installation
- Click Create
Step 2 – Testing the deployment
- Take the DIR where you created the silent install (ACAPMEP2013 for me), and move it to a test system that has a KACE agent installed on it.
- Ensure that .Net4 is installed on the machine before continuing
- If .net 4 is not installed AutoDesk won’t install and it will not create a log file in %Temp%.
- This step can be automated with KACE as well, but is beyond the scope of this document
- In the AutoDesk folder (ACAPMEP2013) browse to the SMS_SCCM scripts folder and open up the file **********_SCCM.txt
- Locate the command line starting with .\AdminImage\setup.exe
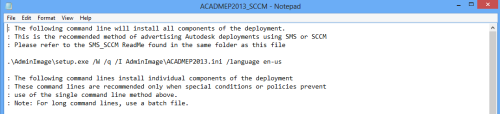
- Open up an elevated command prompt, navigate to the root of the directory where your AutoDesk install is located and execute the install command per the command line located in the step above.
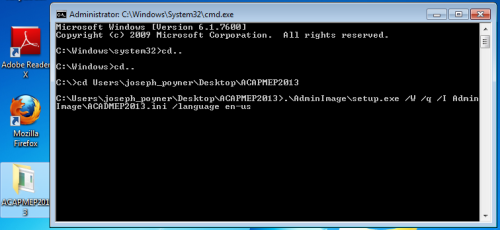
- Wait for the install to finish and check that the AutoDesk product is functioning as desired. If the install fails, contact AutoDesk support for assistance with the creation of the installer.
- After a time you should see the icons for the AutoDesk products you chose. The installation process can take a while due to the large size of the files and time it takes to install AutoDesk.
Step 3 – Uploading the deployment to KACE
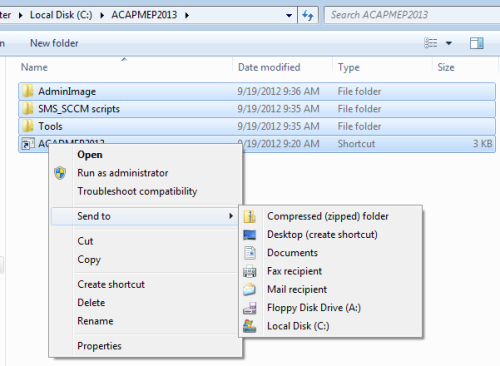
- Zip up the contents of the directory you created using windows zip or 7 zip. Do NOT include the root folder (ACAPMEP2013).
- Log into your KACE appliance, and click Inventory > The test machine you installed AutoDesk on and click Force Inventory Update
- Refresh the screen until the Force Inventory Update button returns, and then navigate down to Software > Installed Programs and locate the name of the AutoDesk product you’re working with. For my product it’s Autodesk Inventor Fusion.
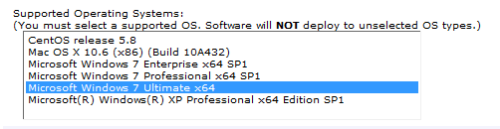
- Scroll to the bottom of the screen and under Selected Operating Systems choose the OS’s you want to approve the install for
- Under Associated Filesclick the browse button and select the zip you created.
- If the file is bigger than 2GB, upload it to \\yourKBOXip\ClientDrop and then you will be able to choose it from a dropdown rather than browsing to it.
- Click Save at the bottom.
Step 3 – Deployment
- Go to Distribution > Managed Installations > Choose Action > Add New Item
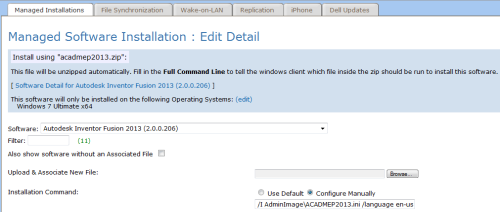
- From the Software dropdown, pick the AutoDesk product you uploaded.
- In the Installation Command field select Configure Manually and insert the command that you tested earlier.
- Under Managed Action choose Execute Anytime
- Under Limit Deployment To Listed Machines choose a separate test machine other than the one you were using earlier (Or uninstall AutoDesk off that machine before continuing)
- Check Custom Pre-Install Message and put “Starting Install”
- Check Custom Pre-Install Message and put “Finished Installing”
- Click Save at the bottom, and then to do the final test, go force an inventory update on the machine you’re deploying the software to.
Resources
- www.kace.com
- K1000 Admin Guide - http://www.kace.com/support/resources/~/media/Files/Support/Documentation/K1000-Admin-Guide-v53.ashx
- www.autodesk.com
- Autodesk Network Install Guide - http://download.autodesk.com/us/industries/mne/pdf/2013/Autodesk_ME_NetworkAdminGuide_enu.pdf

Not sure why. - RMF 11 years ago
--Under Associated Filesclick the browse button and select the zip you created.
--If the file is bigger than 2GB, upload it to \\yourKBOXip\ClientDrop and then you will be able to choose it from a dropdown rather than browsing to it.
Even if I zip the folder, then drop it in that location, I don't get any dropdown menus to select it from. Am I missing something? I'm on 5.4 SP1. - sundermannc@wdmcs.org 10 years ago